
As you might know already, Zapier allows you to link Teamleader Focus to more than a thousand other apps. One of the most interesting possibilities here is linking your online form to your CRM as well as your deals. This way, you can automatically turn every form application into a new contact, a linked company and a deal. You don’t even need any developing skills in order to so. In this article, we’ll tell you all about:
- The forms that can be linked to Teamleader Focus
- The steps you need to take in order to link your form to Teamleader Focus
What forms can you choose from?
These are the most common form integrations to be linked to Teamleader Focus:
- Typeform
- Google Forms
- Gravity Forms
- Wufoo
- Jotform
- Formstack
- Ninja Forms
- Zoho Forms
- Linkedin Lead Gen Forms
- WP Forms
Didn’t find the form you were looking for? Zapier offers some additional form integrations, you might find yours here.
In this example, we’re using Google Forms. We advise you to use the same order of triggers and actions described in this article in order to have the best possible workflow and maximum amount of available fields.
What steps do you need to take?
Before we can install our integration, we need a Zapier account. Depending on the amount of zaps & tasks you want to create, you might want to take a look at their pricing plan.
1. Select the first app, trigger & test
Before we choose Google Forms as our first app, we make sure that we have a form with at least one response (that we can send in ourselves). The following fields might come in handy when integrating with Teamleader Focus:
- Contact name
- Contact email
- Contact phone
- Company
- Interest (you can use the 'interest' of the customer as your deal title later on)
- Budget (the budget of the customer will be the budget of your deal)
- Comments
Note : If your customer is able to fill in a wrong value (f.e. text in a phone number field), the data will not be exported to Teamleader Focus (the same way that you can’t save text in a phone number field in the Teamleader Focus interface either).
Apart from the test response, we also need the form to be linked to a new spreadsheet. In order to link a form to a spreadsheet (in which the responses are collected), simply click this button in the response-page of your form. This is the spreadsheet you will be linking to Teamleader Focus.
We can now get started in Zapier. Choose Google Forms from the drop down menu:
Afterwards, we choose to trigger the zap with each new form response. Then, you click on 'Continue':
Once a trigger has been selected, we can test our first phase. In order to do so, Zapier will ask us to link an existing Google Account in order to know what form we’re talking about. Connect your Google account and continue.
Once connected successfully, you’ll be given the option to choose a spreadsheet (this is the spreadsheet linked to your form). In the ‘Worksheet’-field, you just have to select ‘Form Responses 1’.
After the worksheet has been linked, Zapier will fetch responses that you can use for your test in the step 'Find Data'. Simply choose the first one “Response A” and continue. We now move over to the second step!
2. Select the second app, action and template: create contact
Select Teamleader Focus as your second app. After all, this is where the form info should end up.
You can now choose a certain action.
Note: in this step, it’s important to know that you can create multiple actions one after another. However, the amount of steps within one zap depends on your Zapier license. If you have a free license, you can only choose one action (preferably ‘Create company’ or ‘Create contact’). If you have a paying license, you can choose multiple actions (f.e. ‘Create contact’, ‘Create company’, ‘Link contact to company’ and ‘Create deal’). In our scenario, we’re choosing to make a multi-step zap. If you have a free Zapier license, you can choose to follow only one of the actions described in this article.
We first choose the ‘Create contact’ action:
After we’ve done so, it's time to connect our Teamleader Focus account and continue:
In the following step, Zapier asks us to define a template of what a normal response would look like. What we’re basically doing here, is defining the value for each field we want to export from our form to our Teamleader Focus account. This is where we use the test response of our form: by adding these values to each field, we basically tell Zapier where to find every piece of information.
In order to select the right test responses, we click the “Insert a field”-button on the right of each field. You’ll see a dropdown of the form response, from which you can select the right value.

You basically do this for every field that is mentioned in your form as well. For example: if you don’t ask the customer for his VAT number in the form, leave the ‘VAT’ field blank in your template.
If you fill in a field manually (without selecting a test response), this information will be applied to each entry that is sent to Teamleader Focus. For example: if you fill in the language ‘en’, every new contact created by this zap will have the language ‘English’ in Teamleader Focus.
The last part of the template concerns the custom fields you’d like to export to Teamleader Focus. This might be the most difficult part of setting up this zap, so we’ll zoom in for a second:
When identifying custom fields, you have to give Zapier:
- The Teamleader ID of the custom field you’re talking about
- A test value from your form responses
Both have to be written down exactly the way Zapier tells you to.
This article describes where to find the Teamleader ID of each of your custom fields.
After having filled in all your relevant fields, you can test this step. This means that Zapier will send the form responses to Teamleader Focus as a new contact. If all goes well, this is your first ever contact created through Zapier!
3. Select the third app, action and template: create company
Choose Teamleader Focus as your third app and select the action ‘Create company’. Follow the exact same procedure as you did for the ‘Add contact’ action.
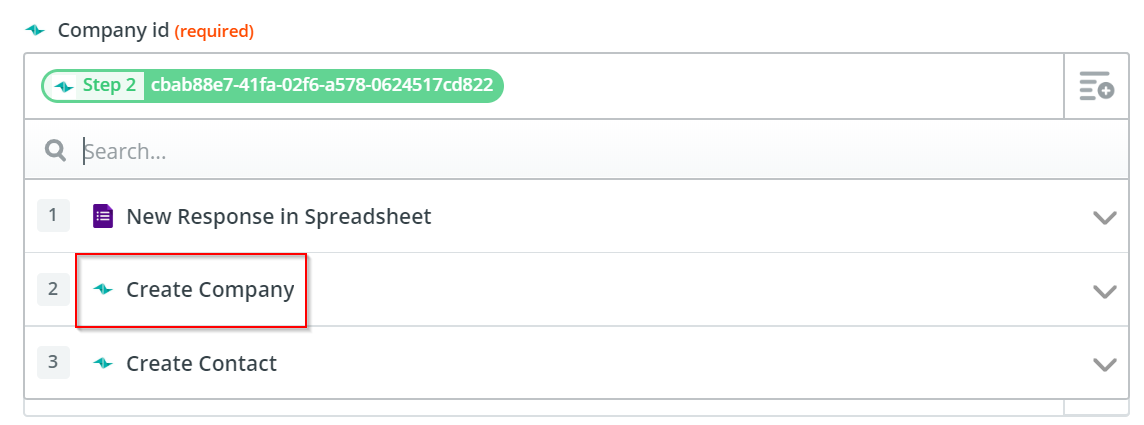
4. Select the fourth app, action and template: Link a Contact to a Company
In this step, we make sure that the contacts & companies coming in through the form, are actually linked in your Teamleader Focus CRM. The fields in this template are very limited, but you’ll notice that two of them require an ID from an earlier step (the contact and company that you created whilst testing step two and three). You can select the ID directly by clicking the button on the right of your field:


After filling in the required field, test this step and notice that the previously created contact and company are now linked in Teamleader Focus.
5. Select the fifth app, action and template: Create deal
In the final step of your zap, select Teamleader Focus as your app and choose the action ‘Create deal’.
In this step, you'll need the contact ID as input to create the deal, so you'll need to fetch this as a selectable 'field' (cf. step 2; creating a contact returns the ID of that newly created contact).
Finally, test this step in order to find out if your previously created contact and company are now linked to this new deal and if all information has come through correctly. If this is the case, your zap is finished and every new form submission will create a new contact that is linked to a company with a deal. All fields will be synchronized according to the way you have set up your templates.